Laser marked instruction of CROSSLOC™

We are planning to add laser-marked instructions for CROSSLOC™ on the nut. CROSSLOC™ is very user-friendly, requiring only the tightening of cap screws to lock and loosening them to unlock. However, we aim to enhance users’ understanding of this system to prevent potential failures and ensure safety on-site. These instructions will be provided in several languages through QR codes scanned from the housing’s pages.
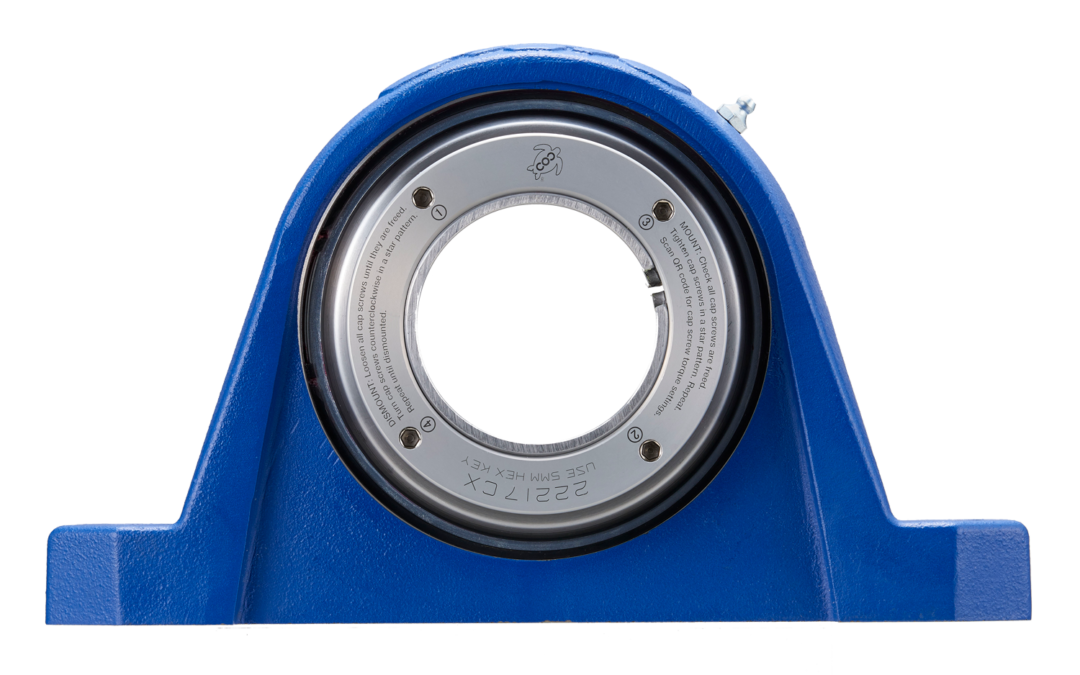
<Information for your technical support team>
This locking system consists of two nuts: the inside nut connects with the inner ring, and the outside nut connects with the adapter sleeve. These two nuts are secured using four (or six) cap screws. The outside nut, attached to the adapter sleeve, is manipulated by the cap screws for locking and unlocking. To lock, the adapter sleeve must be pulled, and left-hand cap screws should be turned clockwise to pull and counterclockwise to push. Tightening the cap screws increases the gap between the two nuts, causing the adapter sleeve to move outward. Loosening the cap screws reduces the gap, moving the adapter sleeve inward. To prevent cap screws from twisting or getting damaged, the outside nut should move in parallel with the inside nut. Therefore, it is essential to tighten the cap screws in a star pattern and repeat the process. You may need to repeat this several times to ensure all cap screws are perfectly tightened, similar to the procedure for tightening automobile wheels.
When you want to unlock CROSSLOC™, you’ll need to loosen and turn counterclockwise. Although it involves a leftward rotation, turning counterclockwise will not loosen it. Begin by loosening all cap screws to free the components. Next, push the outside nut to release the adapter sleeve from the inner ring. Turn the cap screws counterclockwise in a star pattern and repeat until disassembled. The procedure for unlocking is the same as for locking, with the outside nut moving in parallel.

LOCK

UNLOCK
The outside nut should move parallel to the inside nut.