CXC4EF18-090 (E)
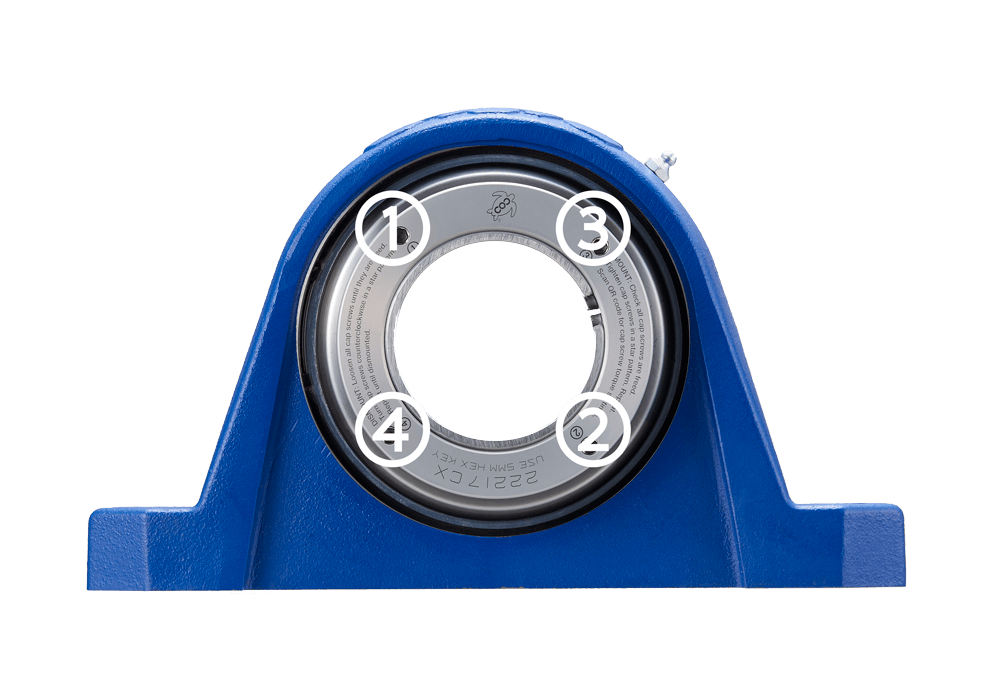
MOUNT:
1. Make sure there is no load on the bearing and all cap screws are loose.
2. Tighten cap screws in a star pattern. Repeat.
3. When using a torque wrench, first tighten each cap screw to 50 percent of the specified torque value, and then tighten them again to the full 100 percent torque value. Make sure to use a star pattern both times.
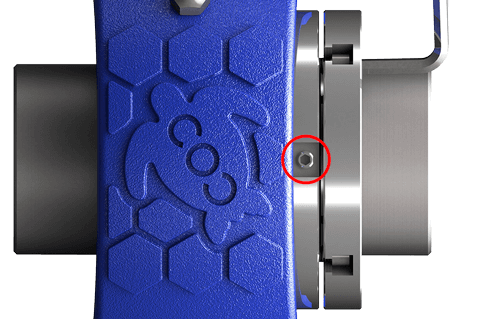
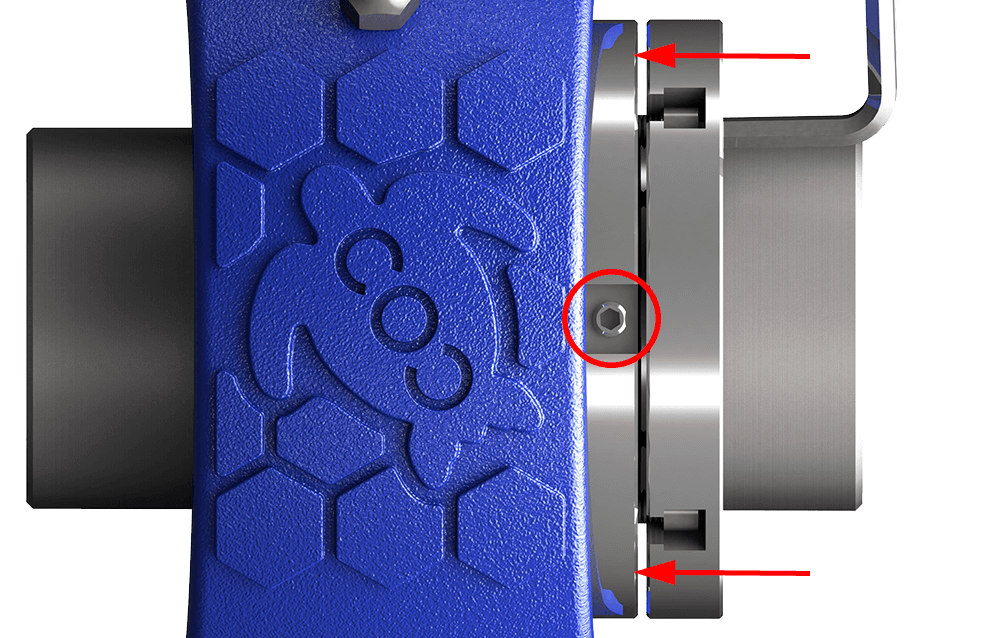
4. Tighten the setscrew circled in red in the picture below.
5. All the cap screws should be fully tightened to the recommended torque, and there should be a gap between the two nuts.
If the outer nut contacts the inner nut during tightening and there’s no gap between them, it means the shaft is too small. In that case, loosen the cap screws to return the nut to its original position, then slightly move the sleeve further inward by loosening it. This allows the sleeve to travel further in and fit the smaller shaft.
Please refer to the ‘Recommended Shaft Tolerance’ section below.

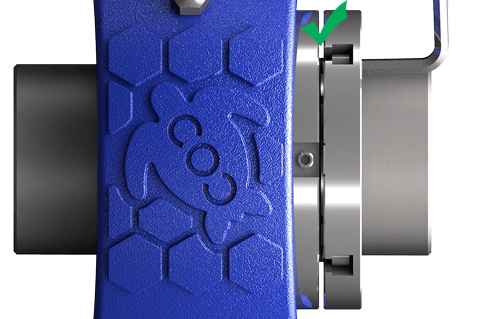
Note: The outer nut must remain parallel to the inner nut to prevent the cap screws from twisting or being damaged. This is why the cap screws must be tightened repeatedly in a star pattern. Several passes may be required to tighten all cap screws evenly.
DISMOUNT:
1. Make sure there is no load on the bearing, then loosen the setscrew(s) on the inner nut.
2. Loosen all cap screws until they are free.
3. Turn cap screws counterclockwise in a star pattern. Repeat until dismounted.
Recommended Shaft Tolerance : -0.004 in. / -0.102 mm
When the shaft diameter is below the recommended tolerance, try the following procedure.
FIX TO EXPANSION
When your application needs to be able to accommodate thermal expansion of the shafting, use only one fixed bearing on each shaft.
By simply moving a snap ring on the back of the unit the bearing can easily be converted from non-expansion to expansion or vice versa.